Thursday, March 30, 2023

Final Editing Touches

 Editing has to be one of my favorite production stages because just putting together the final product is the best feeling in the world. On that note, I have finished the line edit of my opening and am now working on color-grading my footage and going through my audio channels to ensure everything sounds right. Working with 6 different audio channels can be a hassle, but whoever made a naming feature for each audio track deserves a noble peace prize. 

Beautiful, right?
   So anyway, editing has gone smoothly so far and I've been breezing through post-production because of the fact that I estimated the length of my clips with black video. I needed more time to work on my CCR, so that technique saved me a bunch of time. I added the second half of my opening into my timeline and added in some new foley sounds, and completed all my graphics. A few weeks ago I was debating between the "against" and "Aubrey" font for my title graphic, but I actually used both. For my credits in the beginning I used "Aubrey" and for my title graphic, I used "against" since it gave more substance to the title.
"Aubrey" font


Now, I know we were advised against putting our opening's title at the end, but I think it fit my opening, so I went with it. Also... a change was made to the ending of my opening. In my storyboard, I was going to have Iris walk out of her room to get her mother's attention, but when I reflected on that, it didn't feel like an appropriate move for Iris. At this point in the film, their relationship is hanging on by a thread and we don't see the complete ambition to save it yet from Iris and I want that to come out later in the film. I really liked the obstructed shot I came up with and felt as though that would be a more appropriate ending to this opening. Iris honestly feels defeated because it takes a lot of courage for her to confront her mother, so that's the vibe I wanted to go for in the ending instead. We see her defeated posture and she lies back down in bed after her mother completely ignores her when she calls out her name. 

"against" font
I'm pretty much done with editing my opening and the last thing I want to do is color grade and after that, I'M FINALLY DONE!!! Kind of. I still need to complete my second CCR, but I don't think it'll take me too long to edit it. All I have left to edit is some B-roll footage for my director's commentary CCR. My next posts will be the final product and I cannot believe I've made it this far. I feel like I'm going a little insane from using Premiere daily, but it's a good insane. I'll see you for the last time in my next post!!!!! :) 


So I leave you with this:

My look of satisfaction when I finished editing:


Wednesday, March 29, 2023

Putting Together My CCR

In my previous blog posts, I discussed what I planned to do for my CCR: one director's commentary-style video and one presentation. I am writing a script for both of these videos, but I decided to work on the director's commentary script first since it involves the more difficult required questions. Here's how I laid out my script:

Director's Commentary Script
There is so much content to go over in this CCR, so I decided to make life easier for myself by color coding within the script when I'll be putting B-roll clips over the stand-up. I can memorize lines, but I don't know about a whole paragraph, so I needed to know when I could take breaks. To keep track of my bibliography, I put all my sources I'd MLA format later at the very bottom. Obviously, I needed to refer back to the required question, so I just put those in bold so I could easily see it in my script. After doing all that jazz, I timed myself and it came out around 4:30, which does give me some time to do my presentation, which I don't imagine going over another 4-5 minutes. Although my presentation was an easier thing to record, I still needed a script to follow for my voiceover.

I made a separate Google Doc with the presentation script, and this gave me a break from the stand-up style thing since all I had to do was read off this document while going through the presentation. As for the presentation, I decided to go with Canva as my resource. 

Presentation Script


I have just always loved the artistic features Canva offers and it has a built-in voice-over recording feature, so I wouldn't need to edit anything separately. Or so I thought. When I downloaded the file as an MP4 from Canva, it came out as 5:15 and that was really pushing it with the time constraint of 10 minutes, so I cut down all the "fat" from my video (pauses, sentences that didn't add much, etc) and I got it down to 4:42 seconds. I wanted this presentation to be around 4 minutes so I could have more leeway with my director's commentary video, which I knew would be longer. 


Presentation Timeline


A sneak peek!

I filmed my director's commentary CCR after the presentation because I wanted to get the easier one out of the way and have an idea of how long my harder video can be. I filmed my CCR in my living room with some cute decor in the background, and I got to take breaks whenever something was highlighted in yellow. I had to print out some stills from my opening and I changed up what I wanted to say directly to the camera and through B-roll along the way, but I really love how my stand-up looked in the end.


As I put everything together in my Premiere timeline, it was time to add in the B-roll and make it look fun. This took me a bit to find all the footage I wanted and I had the source it as well, but it looks like I'm under 10 minutes! My video was 4:42 which was the perfect time because when I made some calculations, I could not go over 5 minutes in this video.  It's creepily the same exact run time as my presentation CCR, but hey, the universe is in my favor! See you soon!

Random Time Calculator


Tuesday, March 28, 2023

And.. scene! Production comes to an end

 As of today, March 28th, I am completely finished with filming my opening and it's been an awesome experience. It feels more surreal than ever to finally be able to see my visions come to life and see them come together in one video. I thought these eight weeks would feel like a lifetime, but it's quite the contrary. On Monday, I got through half of my opening and it came out as 1:20 in my Adobe Premiere timeline. The best feeling is being able to check off certain shots from my storyboard during and after filming. Here are a few photos from Monday:


In the far right photo, I also got some foley out of the way that I needed to do for the first half of my timeline. I did some footsteps, my shoes falling to the ground, and the bag ruffling I spoke about in my previous blog post from a while ago. All I have to say about Monday is that filming in a fridge is a PAIN. I had to readjust the camera's aperture and ISO frequently so my background wouldn't look overexposed, but in the end, I was pretty happy with how all these shots came out. For a visual representation of my timeline yesterday:


As for my second day of filming, Tuesday, this is when all the action was taking place in Iris's room. I needed to film the shots of myself in the room and the mother's clips, which my lovely mother helped me do. I directed my mom on how she should act to make it look as natural as possible since she isn't very artistically inclined, but she understood the assignment! She actually did really well for her first time being on camera and I enjoyed filming the shots in the room the most because it was the part where we finally get to know Iris. 


Some Directing Moments


Now it's just a matter of importing the second half of my footage in and making sure all the audio is cohesive throughout the opening. I feel like perfecting the audio will take me a while longer than the footage itself. On that note, I'll see you next time when I'm done editing!

Saturday, March 25, 2023

I Gotta Feeling by Black Eyed Peas


 I got a feeling that I found the PERFECT music for my opening. This song not only imitates what I literally just said, but the upbeat vibe of the song is how I'm feeling right now. For a while I was considering using copyrighted music for the song "Emma Suite", from one of my favorite period dramas, EMMA. 


I have a feeling it would've been harder to contact the composers for this movie since it was technically a Universal Studios picture because of the Working Title Films company. Although it was produced by mostly small film companies, I just didn't want to go through that hassle at this point, so I went to the YouTube channel, Audio Library and I've had really good experiences in the past using this particular channel. I was scrolling through a couple of their videos to search for the perfect music when I came across "Life In Silico" by Scott Buckley. I loved the bubbly strings in the beginning, but when I went to download the audio, I thought the ending fit even more perfectly after seeing its description:

(Look at the first sentence)


The ending of my opening really is "bittersweet", but I'm not sure I want to use the song throughout the entire piece, but I may just put the sorrowful ending of the song as the final music you hear towards the end. I didn't want something super bubbly, but I wanted something that was still upbeat for the beginning of my opening and I'm so happy I found it! I'm going to start putting together the footage and audio I have in an Adobe Premiere timeline, so until next time, see ya later!

Wednesday, March 22, 2023

And so, Production Begins!

 This past week I started filming my opening and I've only gotten through about 50% of what I need to film. I said this before, but having a storyboard is a lifesaver when filming. Most of the time it was just: film, look at storyboard, film, look at storyboard. It felt even more satisfying to check off each shot I did on paper after successfully filming it. One concern I had going into filming was whether I was really able to film all of this by myself, but the shots weren't that complicated to set up and I could always look back at the footage if I needed to redo something. My mom would watch behind the camera at times to ensure the focus and lighting looked good. If I was filming something on my own, I'd just flip the viewfinder where I could see it. 


A collage of the filming moments!


Since I was filming in broad daylight, I didn't have to worry too much about using actual lights, but I'll be filming the parts where I do need them next week since this week, I only had my camera and audio equipment to work with. I used a Canon T8I to film along with a Rode mic to record some of the room tone and foley downstairs. One of the photos is me recording the foley of the garage opening for the very beginning of the opening. For the intricate foley sounds like footsteps and the bag ruffling, I'll record that with my Blue Yeti microphone after filming everything. So far, everything seems to be smooth sailing, but I'll check back in soon. It feels surreal that these eight weeks have flown by so quickly, but I'm pumped to finish this project and see other people's work as well. See you soon!


Monday, March 20, 2023

My CCR Plan

 This upcoming week I plan to film both of my media products for my CCR and have a pretty good idea of what I want to do. First and foremost, I have always been the BIGGEST fan of Vogue's YouTube channel. I have watched every type of segment they make: 24 Hours with Suki Waterhouse, the ubiquitous 72 Questions with Whomover, and the celebrity Glam Guide videos, but one segment I particularly loved was the "Life in Looks" videos. In this video, the celebrity is given a notebook with photos of different outfits they've worn over the course of their life, and in turn, they have to tell the audience the story and thought process behind each look. I wanted to replicate this video as a director's commentary CCR except I'd name the segment "Stories in Shots" and I flip through a notebook with different stills from my opening and answer two of the required questions throughout the video. I'm going for answering the harder ones in this video: "How does your product use or challenge conventions..." & "How does your product engage with audiences...".


Proof of how many videos I've watched:

The "Life in Looks" segment


I've actually replicated this video before for CBTV's weekly show, Aftershock, and to this day, it's one of my favorite videos I've created. 


For my second media product, I'd be answering the relatively easier questions through a presentation with a simple voice-over. I'd probably just make Google slides presentation with images and visuals of my opening and answer the questions by reading off a script I create. (I will make the script for both videos, don't worry.) I think I'm honestly a little more excited to create my CCR than my opening just because the opening is the hardest part and the CCR is the arguably more fun part. I'll see you soon!

Saturday, March 18, 2023

I'm Not a List Person..

 Next week, my plan is to finish filming within 2-3 days, but before doing any of that I feel like I should organize what I want to specifically use and do in my opening, which is why making an equipment list and sound list may be a good idea. Typically, I don't tend to create sound or equipment lists because I kind of just like going headfirst into filming once I have my idea down. It's one of the many challenges I've faced when completing this film opening; everything needs to be thoroughly planned out in order for things to be smooth-sailing, as they say. I wouldn't say I'm unorganized and don't plan at all, but with this project, I've really gone HAM with the pre-production stage. So anyway, I wanted to first create a quick equipment list, which didn't take me long.


EQUIPMENT

  • Boom mic + boom pole
  • Canon 90-D DSLR (50mm + Zoom lens)
  • Tripod
  • GVM 3-point RGB light kit
  • TASCAM audio box
  • RODE shotgun mic (foley)

I also took the liberty of color-coding my equipment list so I know what hardware I'll use and what it is for. Whatever is in yellow will be used during production, when filming. Green is just the microphone I'll be using to record foley AFTER production. After watching the foley video last week, I noticed that these foley artists all use some variation of a shotgun mic, and luckily, we're able to check out these mics for free at our school. There's also another place that lets students check out equipment for free called BECON-TV, otherwise known as Shortcuts! I personally know the executive producer of Shortcuts, Jim Guarasci so if I'm not able to check out a piece of equipment from school, he will be the first backup resource I use. Another thing I may be checking out from Jim is a boom mic + boom pole only because the ones we have for our television program are wonky and sometimes don't completely work. They're pretty old, but they get the job done. Now, onto the sound list! I haven't really heard of people using a sound list much because we commonly use "shot lists", but the sound is over 60% of your video, so it's pretty underrated. This is what I've come up with so far:

SOUND
  • Footsteps (wood floor + tile floor?)
  • Keys jingling
  • Backpack movement
  • Room tone
  • Paper handling (poster)
  • Sitting on bed
  • Garage opening
  • Door opening/closing (garage door + fridge)
  • Taking off shoes
It's a pretty general overview of the sounds I want to get, but I was basically writing down the sounds I needed from each scene. At the very beginning of the scene, I plan to start off with the production company graphic title, but in the background, you hear the garage door opening/closing, keys jingling, backpack movement, and footsteps. These are sounds I could probably record right after filming the scene itself since there's no dialogue in the first few shots. The same goes for the rest of the sounds, so referring back to this list will also save me some time during production, so hopefully, all goes well when filming next week! Talk to you soon! 

Thursday, March 16, 2023

Font Focus

 Since I'll be out of town this week, I decided to get the more tedious things out of the way for my film opening, including finding the perfect font. I had a particular vision for the font to feel handwritten and minimalistic. I didn't think this plot would fit with a bolder and taller font such as an Akira or Bebas Neue because of the mellow tone I want to depict throughout my opening. 

An example of Akira
  On that note, going back to my vision of a minimalistic font, I found a few options that I think could work really well for my opening. The first one I found just today is called "against" and it seems handwritten but in a dainty and whimsical way. The next one that's a strong contender for me is "Aubrey" which 
A Bebas Neue font
looks fairly similar to "against" but without the 
whimsical squiggly lines outlining the letters.
I'm not sure if I want that whimsical touch to
the font itself, but I'm leaning toward "Aubrey"
more at the moment. There are two other fonts I did
come across and downloaded because I also liked their minimalistic style. Exhibit A is "Margita". I liked 
how it looked with the lowercase letters, but looking at it again, it looks slightly to square-edged for me.
Hence why I think I'll be ruling this one out. I need to feel completely sold on the font I choose. 

"against" font

"Aubrey" font

"Margita" font

"Dream Orphans" font


For now, I feel like I'm pretty set on either "against" or "Aubrey" as my film opening font, so once I get to post-production, I'll go more in-depth about how both of them look on screen. Searching for fonts today has saved me a lot of time after filming, so now I feel safer going into filming and post-production. See you then!


Tuesday, March 14, 2023

The Colors of "My Iris"

It's taken me a while to think about it, but I think I have my film opening's title down: My Iris. I knew that I wanted to include my main character's name in it or a concept to be part of it, but there wasn't an abstract concept I could pinpoint to my opening or film's plot. Lots of drama films tend to do this with a character's name: Ladybird (2017), the 2023 Oscar-nominated Best Picture, Tár (2022), and Beau Is Afraid (2023) are a few examples. There are two ways to interpret this title: it's a phrase of endearment Iris wants to hear or what the audience thinks the parent would say at first or this is Iris's life story so this is a film through her eyes, thus, instead of "My Eyes", it's fitting to also say "My Iris". 

In celebration of this progress for my opening, I wanted to talk a little bit about how I want my color schemes to come across in my opening. This is heavily dependent on how I decide to enhance my footage in Adobe Premiere, but I've done color grading before so that isn't the hard part. In actuality, the hard part is thinking of a cohesive color scheme you can have throughout your entire film that also conveys meaning. During the first half of my opening I want the color scheme to feel warm, but not in a summery way. Here's what I'm thinking:

My Pantone-inspired palette


Listen, I know I sound like a hypocrite because one of the colors is "Summer Song", but that's on Pantone's 2023 palette. So anyway, I really love the minimalistic branding of Pantone and of course, their expertise with colors, hence why I think they're the best inspiration for color schemes. I referenced their 2023 New York Fashion week color palette for the spring season. 

A lot of these were too bright for my liking, but I used their softer colors because I don't want my color grading to be too harsh and vibrant. It works for dramatic shows like Euphoria which goes heavy on lighting and color schemes, but for my opening, I just want it to feel subtle and deliver Iris as a low-key soft daughter, which is why the palette I created reflects that. I chose a couple blue colors because in the second half, while she's in her room, the color scheme shifts to be much more plain and dismal because of how she internally feels alone or perhaps at home, knowing that her mother is emotionally unavailable. Once they both come on screen, the color grading will definitely be a desaturated type of blue color to express that sense of melancholy Iris feels, since this is after all, from her perspective. With that, I'll be updating you on the production process more in-depth this week as I film some foley for the very beginning of my film opening. See ya!

Friday, March 10, 2023

Classwork Can Be Helpful

 This past week we had to do a blog analysis on Canvas reflecting on other people's past blogs to get inspiration for our own postings. One of the blogs I visited was Riley's AICE Media Blog and there was a site she used for her storyboard that I think would be useful for my own and it's called Studio Binder. Riley and I share the same struggle of not being experts at drawing manually, but I think creating a digital storyboard and shot list is much easier for my brain to process. This is quite literally an earth-shattering discovery because it gives you a ton of organizational options when creating a shot list:


You're just going to have to trust me because of the photo's low resolution, but it lets you choose the type of shot: medium shot, close-up, or wide shot and it even gives you different types of variations for each?? This site was getting better with every click, man.

When I saw this panel, it seriously made my jaw drop, and I love it! The site gave me even more bursts of inspiration when I was scrolling through the other panels for the shot and this panel was even more awesome: it lets you choose the camera height, a dutch tilt if you want a dramatic flair, the framing, and options for the FOCUS AND DEPTH OF FIELD! My fourth shot was originally just going to be a low-angle, close-up of all the stuff placed on the table when my main character Iris walks in, but now I think it'd be even better to make it a rack focus from the stuff in one hand, to the show poster that was in her other. It could imply that Iris is trying to handle her at-home life with the stress of performing in her school's play for the first time.

The other "awesome" panel
For some reason though, the site uploads my storyboard images weirdly, so I guess I'll have to cope with having a physical storyboard and a digital shot list. I still understand my physical storyboard, but as long as my shot list is in one place, filming will be easier for me to go through. Anyway, I'll be working on reorganizing the shots/angles on my storyboard on this site so I can revisit it next week, so I'll see you soon!


Links to an external site.

Wednesday, March 8, 2023

Becoming a Foley Artist

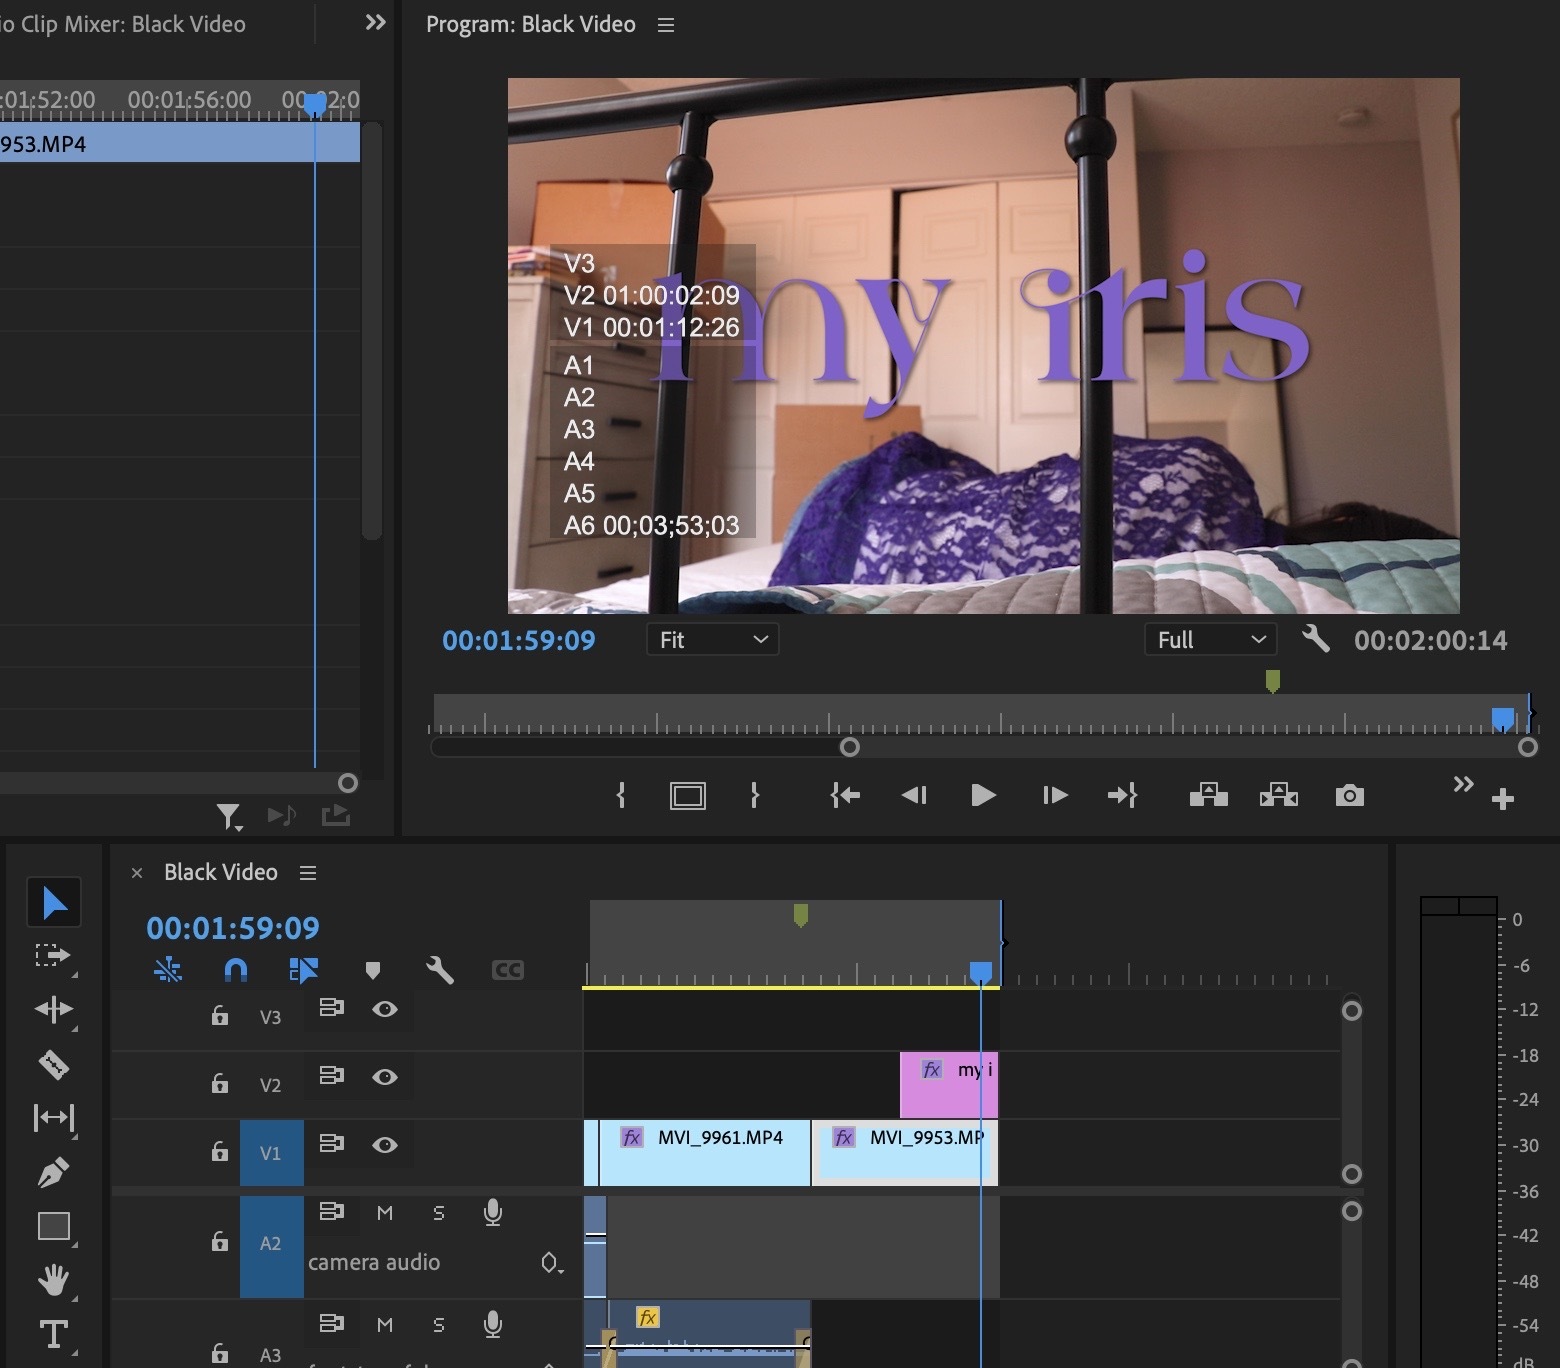
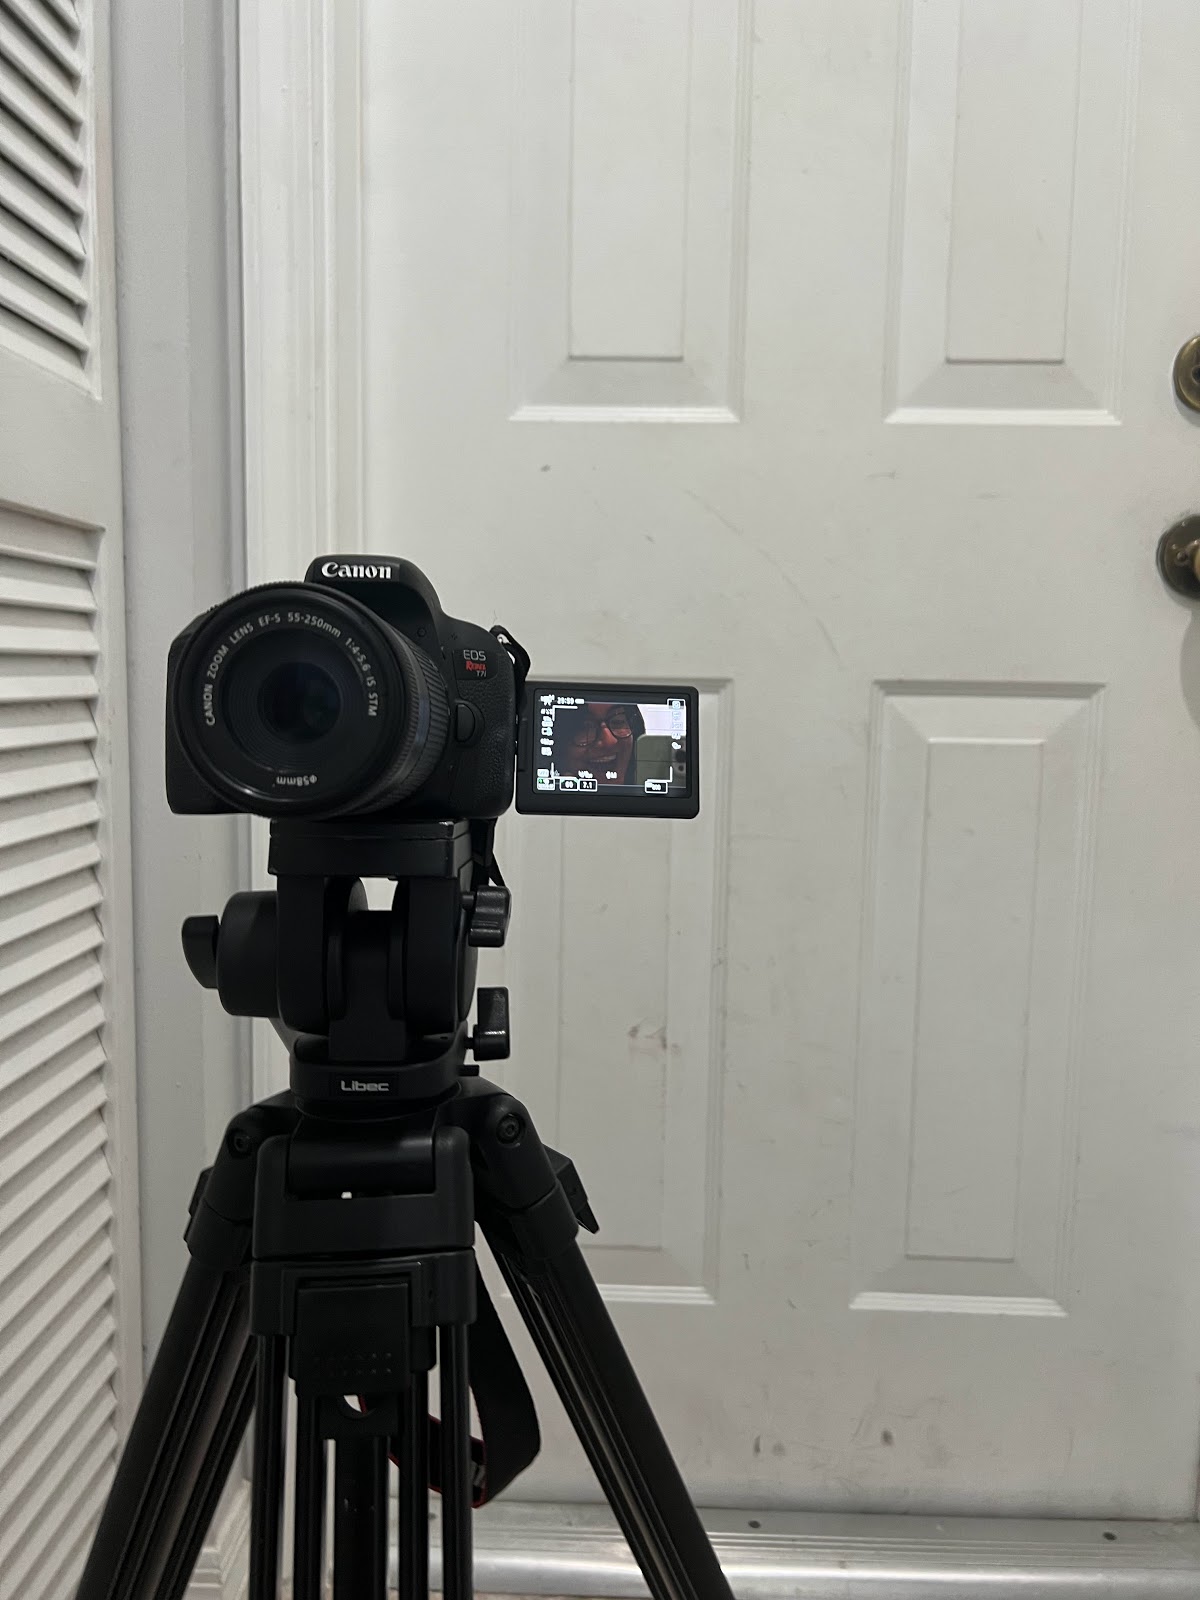
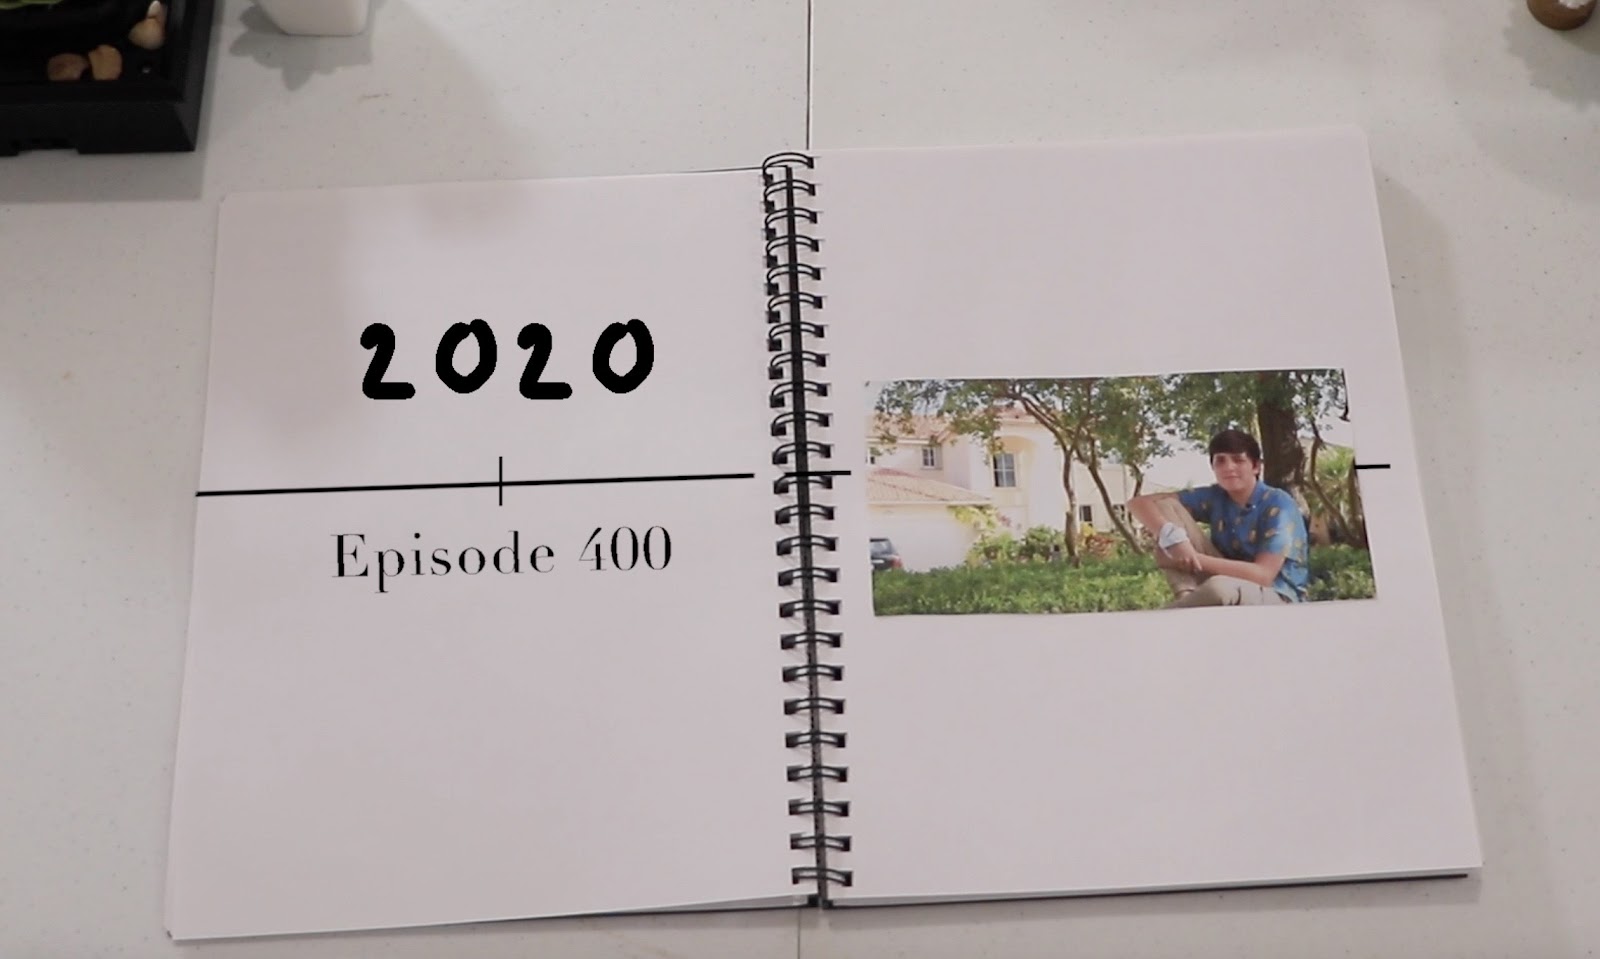
 There's a particular element of my opening that I haven't really put much thought into, but I'd like to start researching methods for foley. If my opening has realistic sound design, it would really elevate the overall quality of the opening itself, so this week I wanted to immerse myself in the world of foley. This is why I turned to my good ol' friend, YouTube to look for some beginner videos to create my own foley. I came across The Film Look's video when searching for the right video and the methods for creating and editing foley were insightful. In terms of creating the foley, he displays the making of the sounds in a quiet room and a shotgun rode-mic. 

I honestly don't have one quiet room in my house, but there is a handy recording room we have on TV that I could use during school one day. I'll be checking out a couple things for this: a boom pole, a boom mic, an XLR cable, and an audio box. These are all things I can just check out from TV luckily. It's a great time to be part of Cypress's television production program, right? Anyway, now onto layering foley sounds properly.

In Film Look's video, he discusses that "footsteps are never alone". Meaning, recording just footsteps alone isn't enough to create a complete sound design for your film, thus, you have to layer it with other elements in the scene to maximize the realisticness. He gave an example of walking through the forest: typically, you'd have to hear the sound of the leaves crunching, but it's also the coat, backpack, and map that's moving along with the character. Although it can be tedious to record the different elements separately, together they make for high-quality foley.

I consider myself to be a pretty hardcore perfectionist and if something isn't close to perfection, I will dwell on it for a long time, so I think the meticulousness of foley will do me some good in the long run. This video also gave tips on how to record those specific elements so they come out nicely. When recording clothing foley, his best tip was to mimic the movement of the character on screen or just move around a little more dramatically so you can really hear the small, subtle sounds well in post. However, the way in which you should mimic the movement was interesting: don't wear the actual jacket or clothing. He suggested rolling up the clothing piece in a big ball and then just mimicking the movement with your hands rather than your whole body. The same tip was given for recording paper elements like a map: mimic the movement to the best of your abilities and follow the action because recording general foley won't sound or look accurate on screen. 

Even after being able to layer all of these elements together, the foley won't sound right without environmental/ambiance noise. I wasn't exactly sure how I would go about this since my opening all takes place in a house, but his tip for indoor scenes was to just record the room tone within that setting. Room tone simply refers to the ordinary, quintessential sounds that come from a location and you don't have to fake it, you just sit there and record it. For instance, maybe I'd hear very distant birds chirping in the background, the AC running, and an echo-y tone of an empty house (for the first half of the opening). 

After watching just this video, I feel much more confident going into this next week to film my foley and the actual scene soon. I'm much more pumped to see the final product when I'm able to combine my cinematography skills and newfound foley knowledge to create a solid opening. Goodbye for now!

Monday, March 6, 2023

Finding Actors Is HARD!

 Just last week, I mentioned that I had a set actress for Iris, but had yet to find a mother to act in my opening. The actress for Iris had a really busy schedule and scheduling time to film was difficult, so that called for finding a whole new cast. I reached out to a lot of different people this past week to help me out, and I ran thin on my luck. It's been an exhausting task for me because I reached out to every theater student and TV student I knew, but none of them had free time to film over the next few weeks. I contacted the theater students I knew first, but they had a school play to rehearse/perform in, so it was unlikely that they would have time during the day to film. As for TV students, most of them are actually my friends but all the people I had in mind either had other big projects to work on or they were just too busy. But I was overlooking something: the one person I never thought about was making myself act. I don't really mind being on camera because I've gotten used to it as an active member of Cypress Bay's television program, but I wouldn't really say I'm good at it. Although it's not an ideal situation, the only person I know I can rely on is myself, and having to schedule filming with someone else could easily prompt filming problems. 

If I don't find someone by the end of this week, I'll have to suck it up and put on my best show. There's a good chance I'll ask my mom to act as the mother as well, but we'll see how finding actors goes this week. On another note, the props have arrived and are mostly ready to go! Here's the anklet I ordered: 


It was a lot thinner than I expected, but if I'm able to use a Canon 50mm lens the shot should be close enough to see the details and even get some really nice depth of field like this: 

Source: Vernon Calmers Photography

Depth of field refers to the distance between the nearest and furthest objects on the camera. Basically: a REALLY blurry background with clear subject = Good! Now that I'm thinking about it, making that specific shot from my storyboard (the close-up of the anklet) have a shallow focus adds much more meaning to the shot. The shallow focus could mirror the amount of value Iris places onto this piece of jewelry because it could've been a gift she received from her mother when she was younger, or a souvenir they got on a family trip. I don't want to think the entire film's plot through, but I know that this specific anklet would be a sentimental object for her because it was a gift, so having that shallow focus could imply an emotional attachment she has to it. The shot would look something like this, but tighter on the anklet:


Basically, the goal for this week is to make sure all my set design is ready to go for filming next week. I want to try filming at least half of it so I have something to edit over spring break. What I am a little worried about is the timing of my opening. I'll have to write out all my shots digitally and estimate how much time each shot will take to calculate a probable run time for my opening. I'll leave that for the next posting though, so stay tuned!


Saturday, March 4, 2023

Propelling Production of Props

 See what I did there, the alliteration? I thought that was a pretty good title for this blog because the only thing I have left to do in pre-production is sort out my opening's props. In my first blog post this week, I started working on Iris's show flyer through Adobe Photoshop and it's time to reveal the final product! Without further ado, I present to you, Lakewood High's production of In The Heights:


I'm genuinely really happy with how it turned out and it looks like a high school-made show poster, or how I wanted it to look. I didn't want it to look overly professional to the point where it just looked like a broadway show, but also not too amature-ish with the graphic design. My plan for making the poster look even more realistic is to print it out with lamination. My local FedEx store offers cheap options for poster printing, so it turns out that using lamination for a small poster is still affordable: 


It's difficult to see because of the low resolution (thanks Google blogger), but it'll cost $3.11 which is a win for me! Next on the list is buying the anklet for Iris's costume design and I think one off Amazon could work as long as it's multi-colored and handmade. I found this particular anklet that caught my eye and would work perfectly for the symbolism I had in mind:


Throughout my opening, the goal was to convey the loyalty and emotional support Iris continuously seeks from her mother despite her not reciprocating the same desire. Since blue correlates with the emotion of loyalty, and the blue beads are the main color of the anklet, it could depict the intensity of her loyalty to her mother along with the small multi-colored beads foreshadowing her name's meaning. In total, I'll be spending $19.01 on props, which is a solid budget for me. I didn't want to waste a bunch of money on getting the things I wanted for my opening when I can just use resources I already have. Not that I wanted to waste money at all, but if I could make bracelets I would. Perhaps that's a hobby I should pick up down the road, but stay tuned for next week when production starts!


Wednesday, March 1, 2023

Thinking Ahead of the Game

 This week I've made good progress with my film opening and I have made some changes to my overall schedule. I was trying to think of people I know that would make a good cast for my opening, so I reached out to a couple of people and so far, my actress for Iris is confirmed! My friend Martina is really involved in Cypress Bay's theater program, so I knew she would definitely be comfortable on camera for my opening. Judging from her response when I texted her, she seemed elated that I spoke to her about the role. As I was speaking to Martina about my whole idea, one thing we had to establish was filming dates so that she could make herself available to film. I thought it would be possible to film by the end of this week, but it turns out that this week is gonna be one of the busiest weeks for me, so I made some changes to my filming schedule. 

Instead of filming throughout this week, I changed my filming dates to start next week and from March 22nd to March 26th, when I get back from my field trip. Before going on my trip, I want to have some footage to edit so I can discuss it in my blogs ahead of time. 

On another note, today we had a lesson on creative critical reflection that I'll need to start thinking about once I'm done editing my film opening. Considering that we need to divide our CCR into two separate media texts, I'm thinking about making a director commentary type of video where I answer the two challenging questions: "How does your product use or challenge conventions and how does it represent social groups or issues?" and the other being, "How does your product engage with audiences and how would it be distributed as a real media text?".  Although these questions provoke deeper thought than the other two, I think I could have fun with them by communicating my ideas in front of a camera and making my video's concept reflect my own personality. I have a couple ideas for the video part of my CCR, but on the other hand, I think I want to do a presentation for the other two questions left of the CCR: "How did your production skills develop throughout this project?" and "How did you integrate technologies -- software, hardware, and online -- in this project?". It would be easier to demonstrate the software and hardware I used through a means of visual presentation and briefly talk about the development of my skills after this project. I'm actually feeling more at ease now with our lesson because I'll know how I want to approach my CCR in the coming weeks following the post-production of my opening. The next order of business is finalizing my actors and getting all the props ready to film this upcoming week. I'll talk to you soon!

My Film Opening

 IT'S FINALLY DONE!!!!!!!!!!!!!!!!!!!!!!!!!!!!!!!!!!!!!!!!!!!! ROUND OF APPLAUSE FOR MYSELF!!!!!!!! This has been a long time coming, bu...